
Quick Answer
Protect people first, control or assign the source, document conditions, and avoid actions that spread water, dust, soot, mold, or chemicals. The final plan should be based on material condition, contamination, access, measurements, and a clear completion standard—not appearance alone.
Key Takeaways
- Safety and source control come before cosmetic cleanup.
- Document the original condition and every major scope change.
- Hidden layers and building systems can remain affected after surfaces look normal.
- Use material-specific methods, product labels, and measured completion criteria.
- Seek professional assessment for extensive, contaminated, recurring, hidden, or hazardous conditions.
Understanding Mold Lab Reports Without Overreacting to a Single Number is useful only when the inspection or sampling plan is tied to a clear decision. Results need context from moisture history, building systems, visual findings, occupant concerns, and the limitations of each method. A strong plan is built from observations and measurements rather than assumptions based on appearance alone.
Understanding Understanding Mold Lab Reports Without Overreacting to a Single Number
An indoor air quality or mold evaluation should answer a practical question, not merely produce a number. A sound investigation combines building history, occupant observations, visual inspection, moisture measurements, HVAC conditions, and—when justified—targeted sampling interpreted in context. For understanding mold test results, apply those principles to the actual source, material condition, building layout, and evidence available at the property.
Inspection identifies building conditions and moisture pathways; testing collects a sample for laboratory or field analysis. Air samples characterize airborne particles during a limited period, while surface samples document material from a specific spot. Neither method alone maps every hidden area. The choice should follow the decision the property owner needs to make.
The answers below explain common questions, but on-site conditions still control the final recommendation. Use the questions to organize a contractor conversation and document any answer that affects scope, access, cost, or safety. For understanding mold test results, apply the guidance to the actual source, material condition, building layout, and occupants rather than treating it as a generic restoration formula.
For project-specific help with understanding mold test results, review EPR’s mold testing information. A site assessment can connect the visible condition to the source, material condition, and safe restoration sequence.
Immediate Priorities and Stop Conditions
Start with the building and moisture history. Sampling cannot repair a leak, and a normal-looking air result does not prove that every concealed cavity is dry. Conversely, one elevated result should not be interpreted without considering outdoor conditions, sample location, method, and visible evidence. A useful next step either controls the hazard, clarifies the scope, or creates a better record.
Stop and keep the area restricted when any of the following is present:
- Persistent musty odor.
- Visible growth or water staining.
- Repeated condensation.
- Occupant symptoms that require medical evaluation.
- Unsafe access to attics, roofs, or electrical equipment.
Treat uncertain electrical, structural, fire, sewage, or chemical conditions as stop signs. Obtain qualified clearance rather than testing the area through trial and error.
A Step-by-Step Response Plan
- Define the question before testing. Decide whether the concern is a visible area, hidden moisture, post-leak conditions, HVAC contamination, an odor, or verification after remediation. A clear question helps determine whether inspection alone is sufficient or whether sampling may add useful evidence.
- Collect building history. Record leaks, storms, plumbing repairs, roof work, HVAC problems, prior remediation, vacancy periods, and changes in odor or comfort. Dates matter because moisture conditions can change before the inspection occurs.
- Connect each sample to a decision. Before collection, ask what result would change the recommendation. If the answer is “nothing,” the sample may add cost without clarity. If it can distinguish a source, support a protocol, or verify a defined condition, document that purpose.
- Inspect moisture pathways. Check areas around plumbing, windows, exterior walls, closets, air handlers, ceilings, flooring transitions, and rooms below known leaks. Surface appearance can be misleading, so readings are compared with unaffected reference areas when possible.
- Use sampling selectively. Air and surface samples answer different questions and have limitations. Sample placement, collection time, outdoor comparison, recent cleaning, HVAC operation, and laboratory methods can influence results. Sampling should support—not replace—the physical investigation.
- Interpret patterns rather than isolated values. Look for agreement among history, odors, visible conditions, moisture readings, and sample findings. A report should distinguish observations from conclusions and explain what remains uncertain.
Keep the sequence flexible as new findings appear. Opening a cabinet, wall, floor edge, or mechanical area may reveal a different moisture path or residue boundary, so record each change and the reason for it.
Do’s, Don’ts, and Common Mistakes
Do
- Preserve photographs, readings, damaged parts, and a timeline when it is safe to do so.
- Correct or isolate the source through the appropriate qualified trade.
- Protect unaffected rooms, contents, HVAC pathways, and occupants while work is underway.
- Use product labels, equipment instructions, and material-specific guidance instead of improvised mixtures or settings.
- Set clear criteria for drying, cleaning, verification, and reconstruction before closing the file.
Don’t
- Ordering a broad test panel without defining what decision the results will support.
- Assuming a single air sample represents every room, wall cavity, and time of day.
- Ignoring outdoor conditions or the HVAC operating state during interpretation.
- Using color, odor, or one laboratory count as a stand-alone diagnosis.
- Failing to correct moisture because a sample result appears low.
- Ordering samples first and investigating the moisture source later.
Site-specific hazards and limitations take priority over convenience, speed, or a prewritten sequence.
How a Professional Evaluation Adds Value
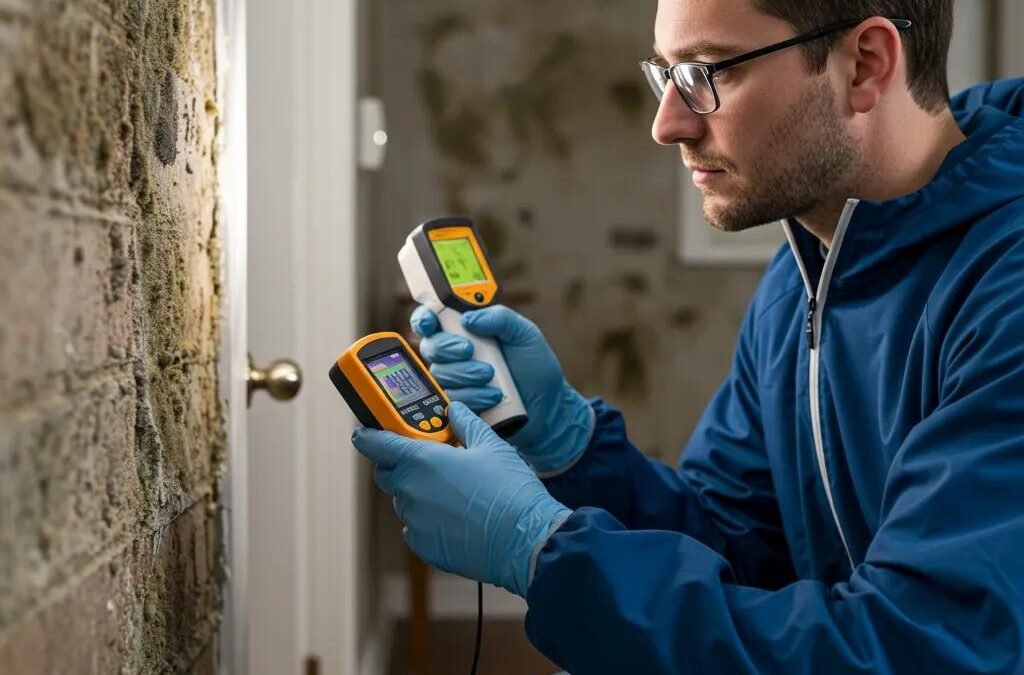
A qualified investigation may include interviews, room-by-room inspection, humidity and temperature readings, moisture mapping, HVAC review, borescope or thermal screening, and carefully selected air or surface samples. The report should explain limitations, observations, interpretation, and recommended next actions in plain language. For understanding mold test results, the provider should connect each recommended action to an observed condition or documented project criterion.
Request a line-by-line explanation of affected areas, source assumptions, material decisions, equipment, monitoring, exclusions, and closeout records. Unclear responsibilities should be resolved before work advances.
Complex losses require coordination among restoration and the appropriate source-repair trades. Hidden cavities, shared systems, contamination, and recurring symptoms are common reasons to escalate. Contact Edwards Property Remediation for a South Florida assessment when the work exceeds a safe, limited owner response.
South Florida and Building-Specific Considerations
Florida properties often operate with a large difference between hot, humid outdoor air and cool indoor surfaces. Air leakage, oversized or short-cycling air conditioners, blocked condensate drains, and closed rooms can create localized humidity even when the thermostat seems comfortable. These conditions should be considered when planning a response to understanding mold test results.
Florida properties often operate with a large difference between hot, humid outdoor air and cool indoor surfaces. Air leakage, oversized or short-cycling air conditioners, blocked condensate drains, and closed rooms can create localized humidity even when the thermostat seems comfortable. For understanding mold test results, measured conditions should guide ventilation, drying, and access decisions.
Humidity management is part of the restoration plan, not a cosmetic comfort setting. Watch for closed rooms, supply vents, exterior walls, and other localized moisture zones.
Prevention and a Better Next-Step Record
Maintain stable humidity, repair water entry, service HVAC and condensate components, use kitchen and bath exhaust correctly, avoid blocking supply and return airflow, and investigate recurring odors or condensation before finishes deteriorate. Tie each preventive task back to the specific source or weak point identified while addressing understanding mold test results.
Save before-and-after photographs, source-repair records, drying or cleaning documentation, product and equipment information, invoices, warranties, and reviewer notes. Add the repaired component to a maintenance calendar.
Before closing a file involving understanding mold test results, confirm that the source is corrected, affected materials are dry and clean to the project criteria, hidden areas have been addressed, temporary controls are removed, permanent repairs are complete, and occupants or managers know what to monitor. If any answer is uncertain, keep the issue open.
Trusted References and Editorial Boundaries
This faq about understanding mold test results follows safety-first principles from public guidance and is written for property decision-making. It does not diagnose health conditions, determine legal responsibility, guarantee insurance coverage, or replace an on-site inspection.
Questions to Ask Before Work Begins
For understanding mold test results, use the following points to keep the project transparent and reviewable. Written answers are more useful than informal assumptions, especially when several parties are involved.
- What evidence supports the affected boundary?
- Has the source been stopped or assigned to the correct trade?
- Which materials are expected to remain, be cleaned, be dried, or be removed?
- How will readings, products, equipment, and scope changes be documented?
- What must be verified before containment, equipment, or temporary protection is removed?
- Who will communicate with occupants, management, and the insurer, and how often?
Store the answers with the property file for understanding mold test results and update them when the source, scope, or schedule changes. This reduces repeated site visits and conflicting instructions.
A Practical Documentation Template
For understanding mold test results, use the following points to keep the project transparent and reviewable. Written answers are more useful than informal assumptions, especially when several parties are involved.
- Incident date and discovery time.
- Who discovered the condition and where.
- Suspected and confirmed source information.
- Safety restrictions and people notified.
- Photos, videos, readings, and affected materials.
- Temporary actions, vendors, equipment, and products.
- Daily progress, decisions, and unresolved questions.
- Final verification, repairs, invoices, and maintenance follow-up.
Store the answers with the property file for understanding mold test results and update them when the source, scope, or schedule changes. This reduces repeated site visits and conflicting instructions.
Frequently Asked Questions
What should I do first?
Keep people away from hazards, identify whether the area is safe to enter, and stop or assign the source when that can be done safely. Photograph conditions before cleanup, then choose actions based on contamination, materials, and access.
Can a property owner handle this without professional help?
A limited owner response may be reasonable only when the source is corrected, the area is small and safely accessible, contamination is not present, and all affected materials can be cleaned and dried. Stop if the area expands, utilities are involved, or hidden damage is suspected.
How long can evaluation, cleanup, or drying take?
There is no reliable fixed duration. The timeline depends on source repair, extent, material layers, contamination, access, drying or cleaning response, inspections, and reconstruction. Ask for measurable milestones and written updates rather than a guaranteed number of days.
What should I document before work begins?
Take wide and detailed photos, record discovery time and suspected source, list rooms and contents, save communications and receipts, and keep logs of readings, equipment, products, removals, and repairs. Follow insurer and safety instructions about preserving damaged parts.
When should I call a restoration professional?
Call when the source is unknown or active, the damage is extensive or hidden, water may be contaminated, mold or fire residue is present, HVAC or electrical systems are involved, occupants are vulnerable, or you cannot verify that materials are clean and dry.
Does this resource determine insurance coverage or health risk?
No. Coverage depends on the policy and claim facts, and health concerns require a qualified medical professional. This resource provides general property guidance and should be reviewed against on-site conditions and local requirements.
When Professional Help Makes Sense
If the property has extensive damage, contaminated water, electrical hazards, persistent moisture, widespread mold, or fire residue, avoid disturbing the area and arrange a professional assessment. Learn about EPR’s Mold Testing service or contact Edwards Property Remediation at (754) 221-6945.
This educational resource is not medical, legal, or insurance advice. Follow emergency instructions from local authorities and qualified professionals.